Retro Raycasting game - part 2
A few weeks ago I wanted to code a 3d video game in C++. To share my experience, I decided to write about the rendering technique I used. This post follows part 1 where I explained how to render textured walls.
To make you enjoy my game (still in development) I compiled it with emscripten which gives an executable in webassembly! Feel free to play it here.
Having walls is good, but having a textured floor is even better! Let’s see how I achieved the look of the floor.
The Basic Idea
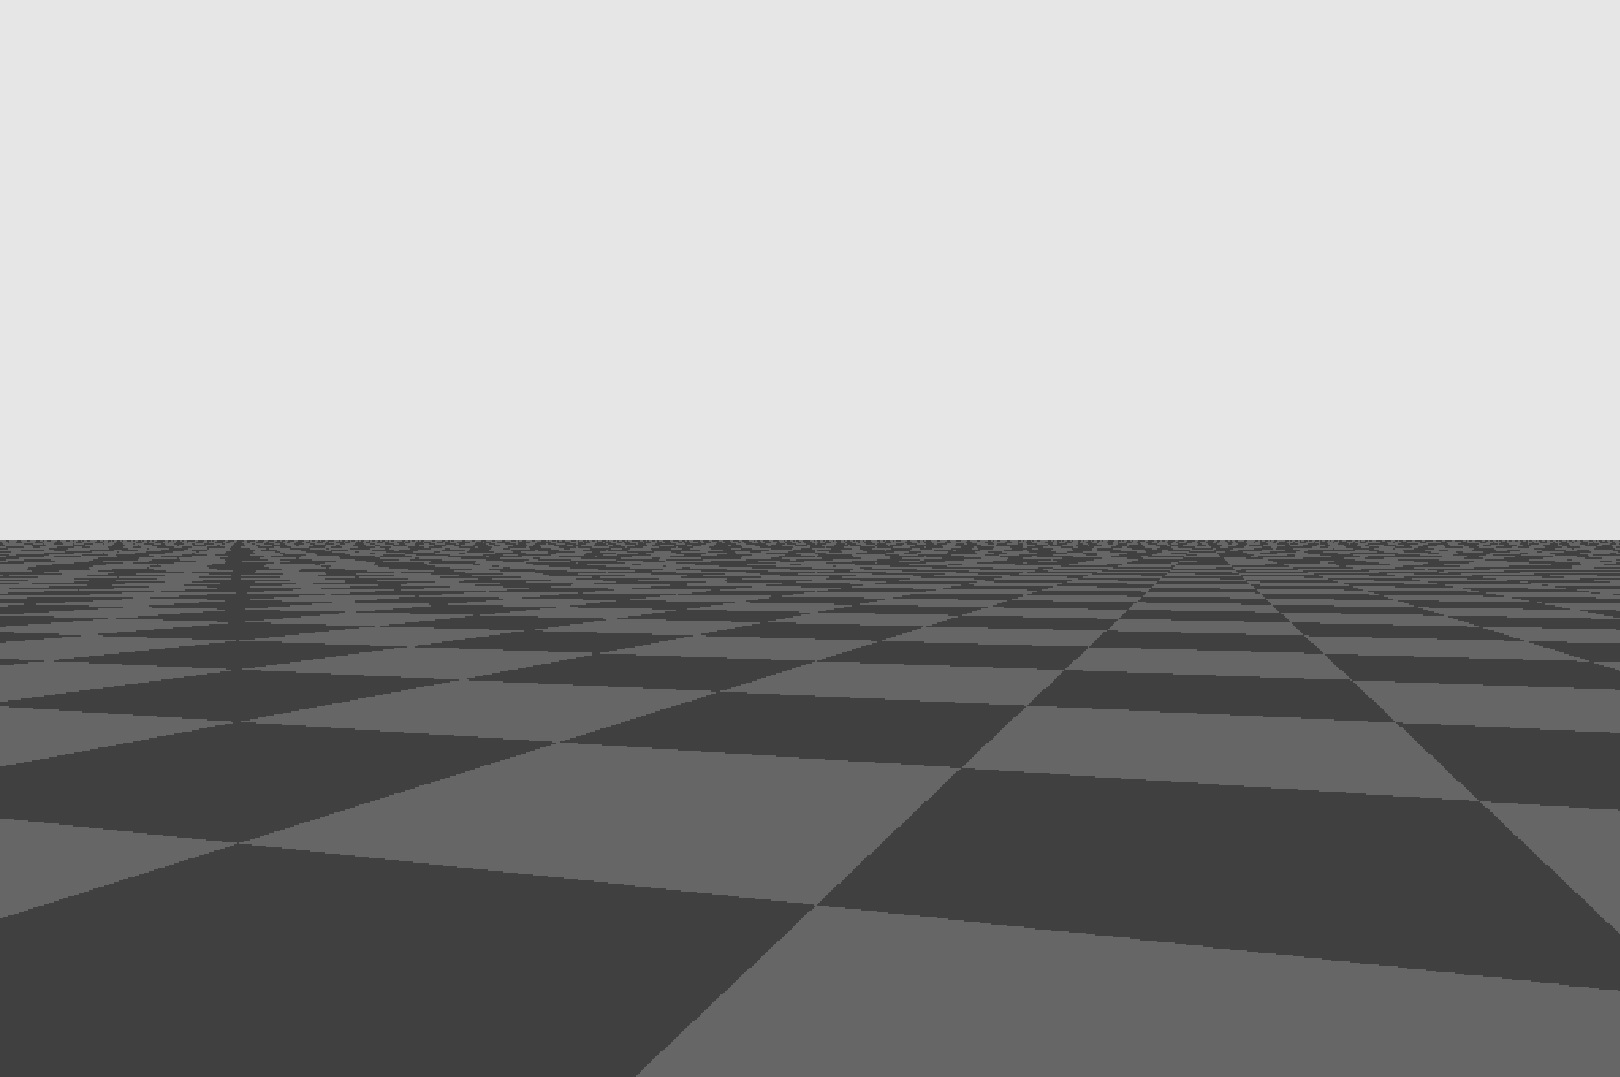
To render the floor, we will again rely on raycasting, but the technique is quite different. The goal is to render a perspective grid that fills the lower half of the window. The horizon line is therefore at the midpoint.The idea is to render the floor before the walls; this way, parts of the floor that are not supposed to be seen will be covered by the rendering of the walls.
The difference with walls is that it is necessary to cast as many rays as there are pixels to achieve a textured floor, but by proceeding intelligently, we can limit the number of operations.
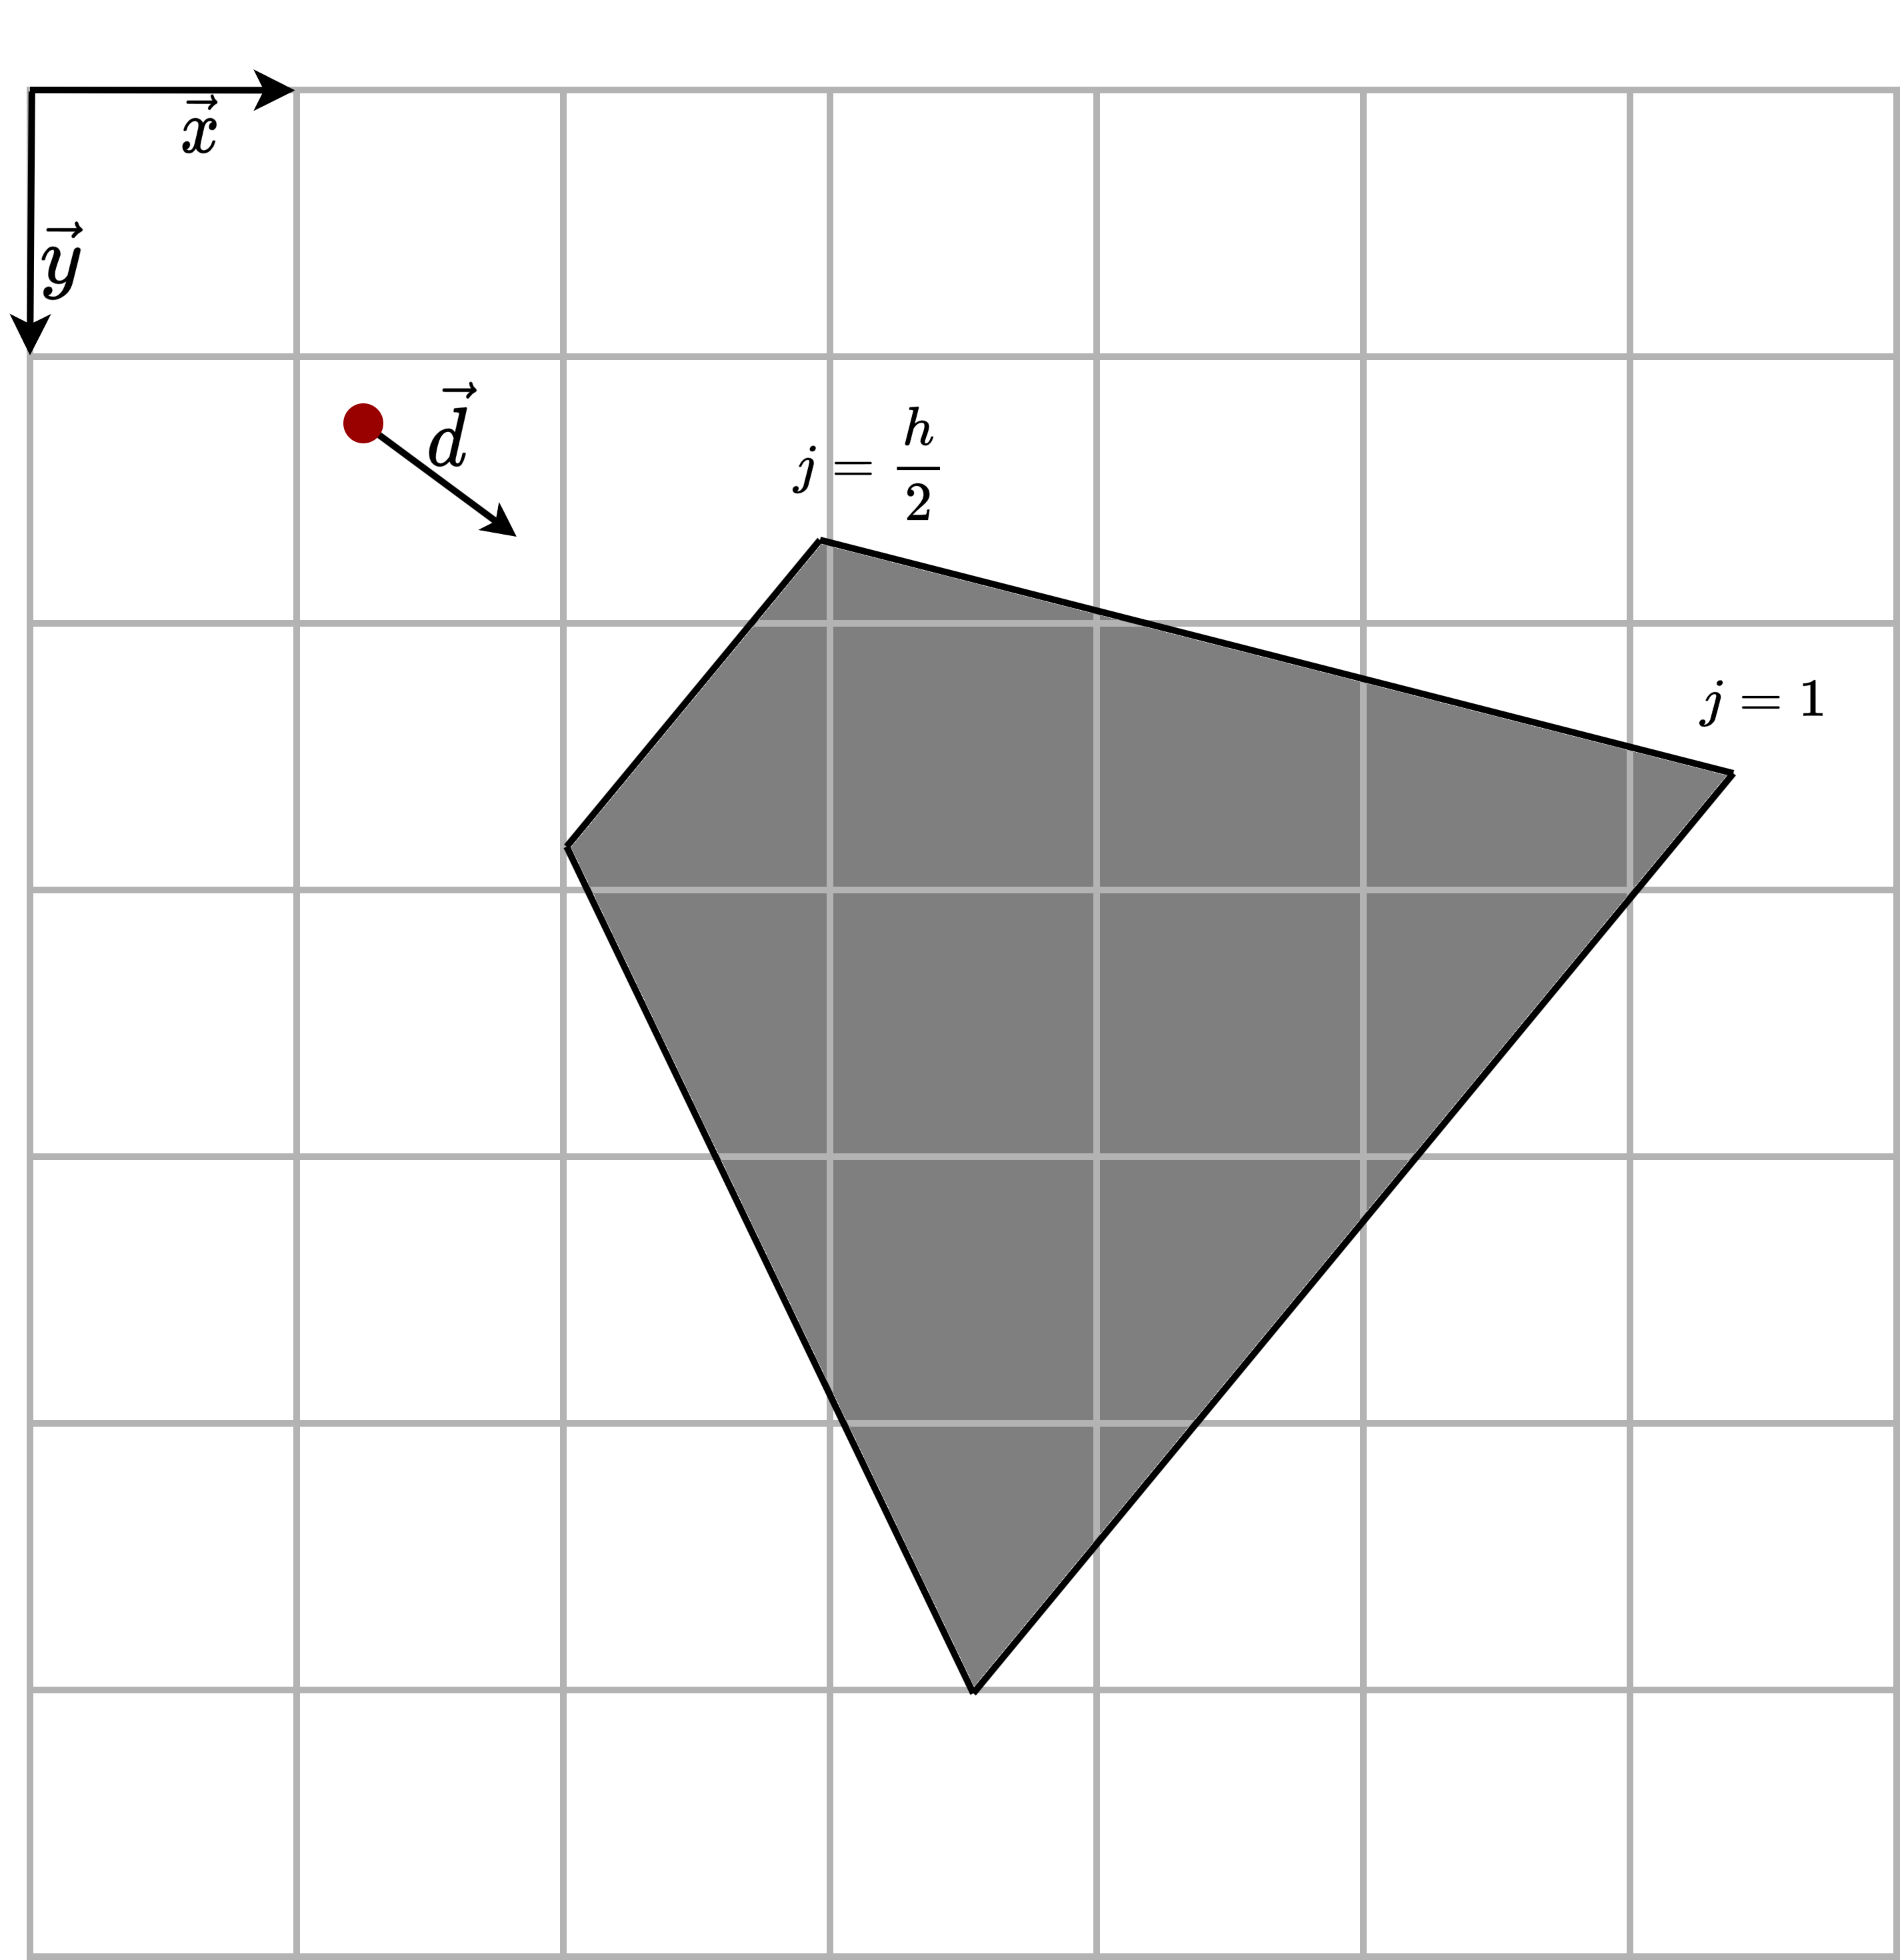
In the figure below, the gray isosceles trapezoid represents the part of the floor to be displayed. The scanlines are the segments parallel to the bases of the trapezoid. The small base corresponds to the bottom of the window, and the large base corresponds to the horizon line in the middle of the window.
A bit of geometry
In order to be as efficient as possible, we will work scanline by scanline because the rays on the same scanline all have the same distance perpendicular to the player.
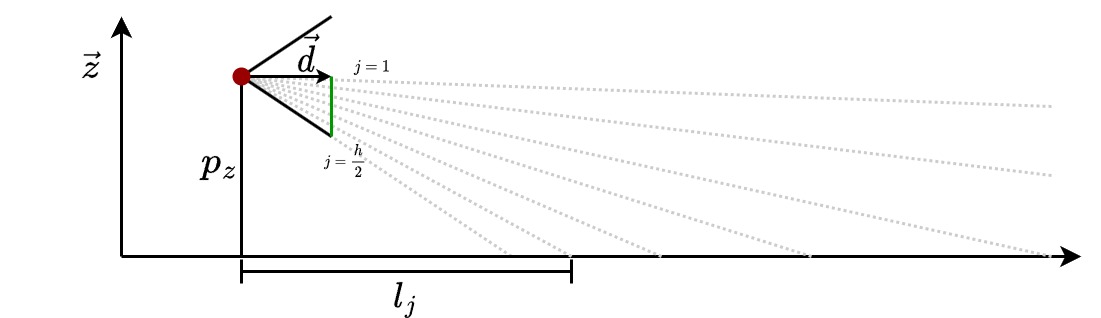
Let \(j\) be the index of the scanline, where \(j\) ranges from \(1\) to \(\frac{h}{2}\), with \(1\) corresponding to the horizon line in the middle of the window, and \(\frac{h}{2}\) corresponding to the last line at the bottom of the screen (at the player’s feet). Let \(l_j\) be the perpendicular distance between the floor and the player. And let \(p_z\) be the height of the camera in the game (the player’s eye level). Remember, in the earlier part, we decided to center the walls in the middle of the screen, and since all these walls have a height of \(1\), we have \(p_z = 0.5\).
With a bit of geometry and using the same notations as in Part 1, we find that:
\[l_j = \frac{p_zw}{j2\|\vec{c}\|}\]Here, \(\frac{w}{2\|\vec{c}\|}\) represents the ratio between the pixel width of the window and the in-game width of the camera.
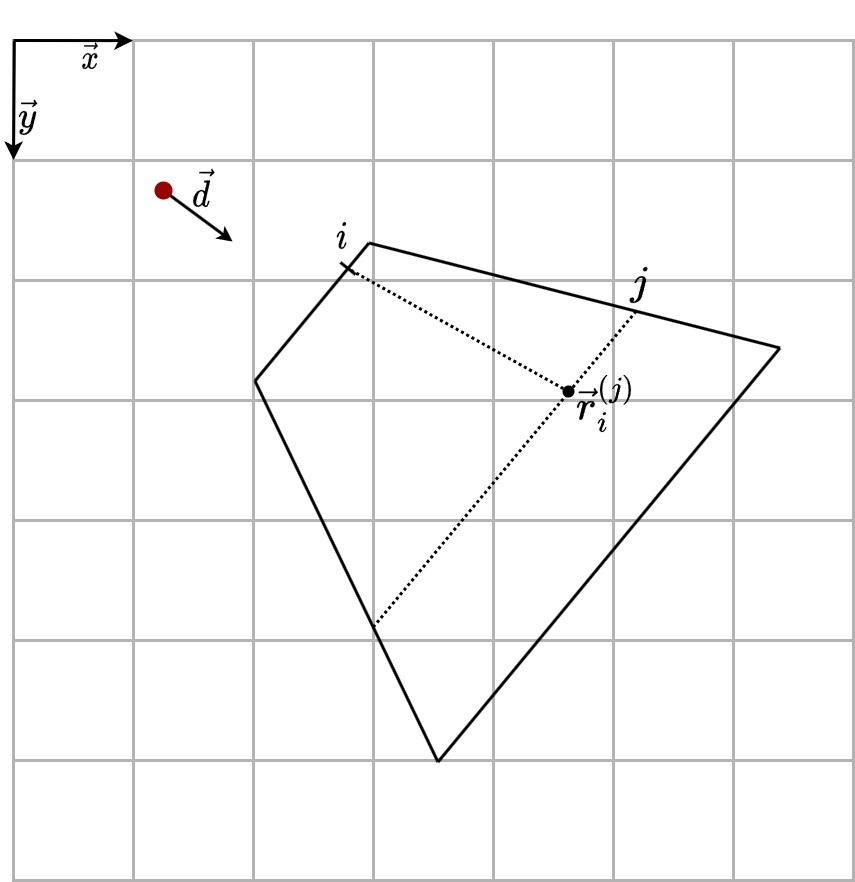
Since \(l_j\) is constant for all rays on a scanline \(j\), we first iterate over the scanlines (\(1\le j\le \frac{h}{2}\)), calculate \(l_j\), and then compute the coordinates of the rays sent for each pixel on that scanline. Let \(0\le i\le w\) be the pixel index in width. The vector of the ray of the scanline \(j\) on pixel \(i\) is:
\[\vec{r}_i^{(j)} = \vec{p} + l_j\left(\vec{d} + \left(\frac{2i}{w} - 1\right)\vec{c}\right)\]As a reminder, \(\vec{d}\) is the player’s direction vector in the game, and \(\vec{c}\) is the vector perpendicular to \(\vec{d}\) with a norm equal to half the width of the camera.
The grid
The vectors \(\vec{r}_i^{(j)}\) represent the in-game coordinates of the point on the floor that should be rendered to the window at pixel \((i+\frac{h}{2},j)\). To create a checkerboard floor, we can simply consider the integer parts of the coordinates of this vector. We color the pixel black if the remainder of the division of the sum of the integer coordinates is equal to 1. If everything goes well, the bottom of the walls should align perfectly with the sides of the checkerboard squares!
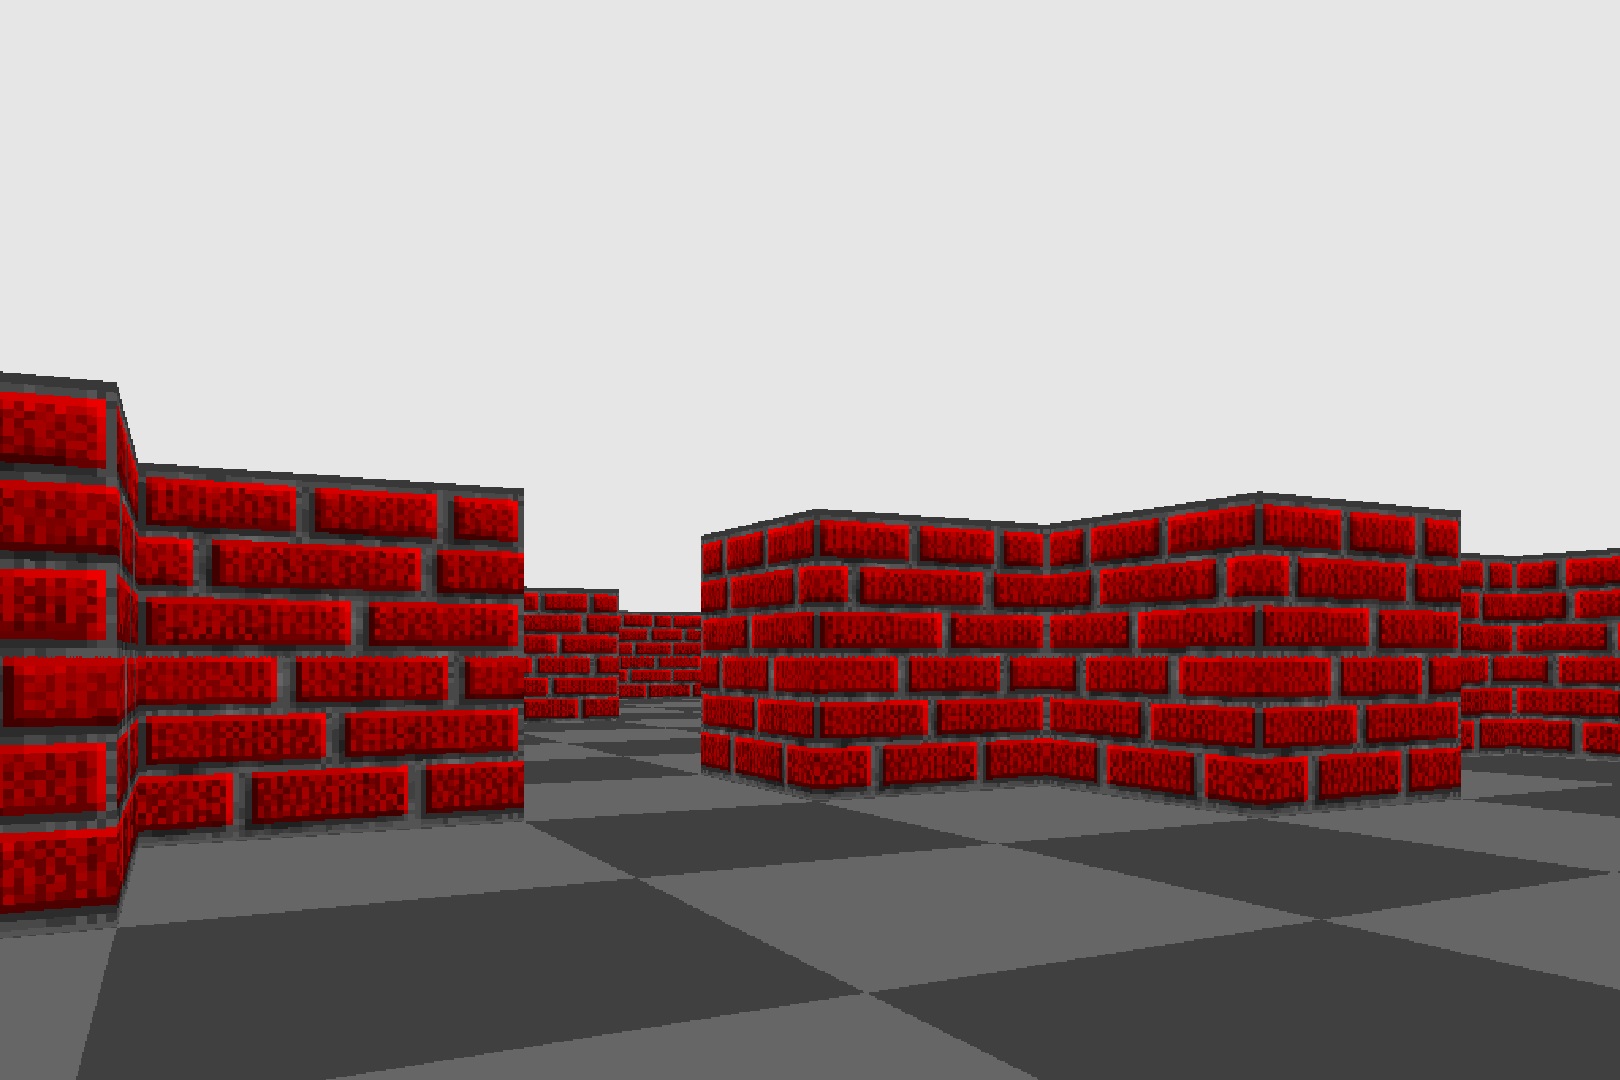
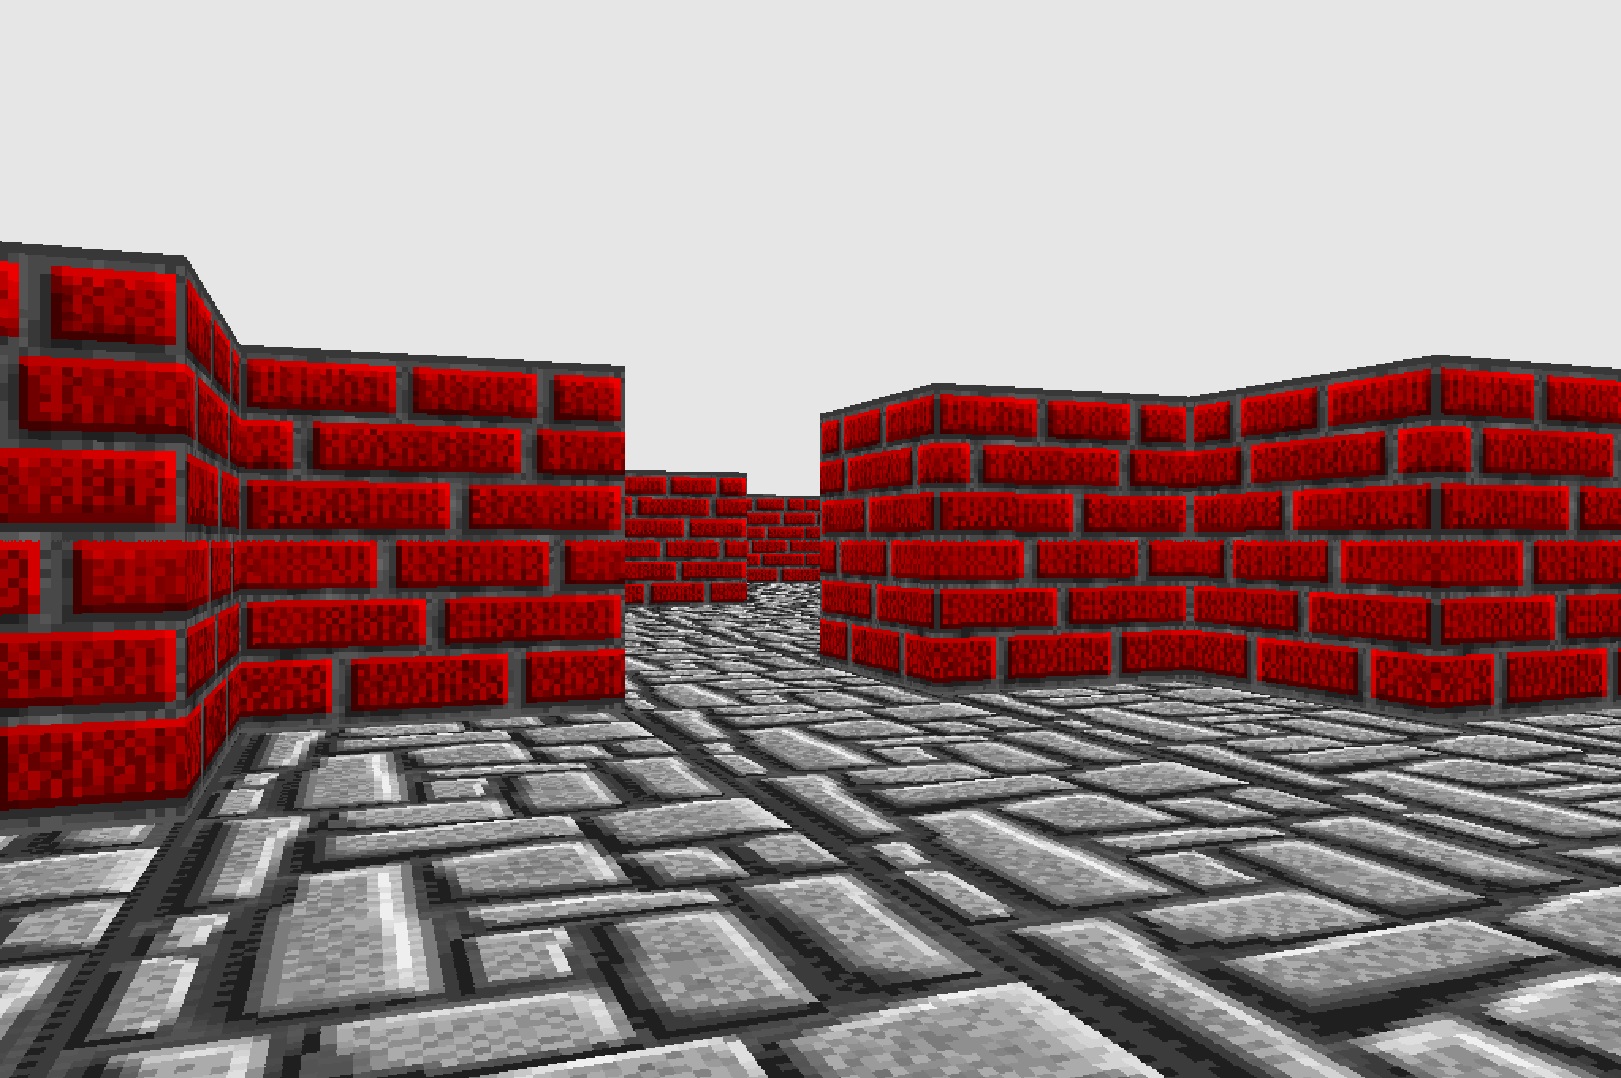
Textured floor
Great, we’ve done the most challenging part! To texture the grid squares, we use the same technique as for the walls. We take the decimal parts of the coordinates of vectors \(\vec{r}_i^{(j)}\) and match them with the color of the pixel at the same relative coordinates on the texture.
The code
constexpr int w = 1080;
constexpr int h = 720;
constexpr int texture_size = 64;
class Player {
public:
float p_x;
float p_y;
float d_x;
float d_y;
float c_x;
float c_y;
};
class Game {
public:
void raycast_floor();
Player player;
Uint32 texture[texture_size*texture_size];
Uint32 scene_pixels[w*h];
}
void Game::raycast_floor() {
// we use rays to find the coordinate of the floor
float left_ray_x = player.dir_x - player.plane_x;
float left_ray_y = player.dir_y - player.plane_y;
float right_ray_x = player.dir_x + player.plane_x;
float right_ray_y = player.dir_y + player.plane_y;
// j index of the scanline from the center of the screen
for (int j=1; j < h/2; j++) {
// horizontal distance from the player to the floor line
float floor_distance = h / j * player.position_z;
// floor coordinate of the left ray
float floor_x = player.position_x + floor_distance * left_ray_x;
float floor_y = player.position_y + floor_distance * left_ray_y;
// floor step to go to the next right pixel on the screen
float floor_step_x = floor_distance * (right_ray_x - left_ray_x) / w;
float floor_step_y = floor_distance * (right_ray_y - left_ray_y) / w;
for (int i=0; i < w; i++) {
// the cell coord is got from the integer parts of floorX and floorY
int current_cell_x = (int)(floor_x);
int current_cell_y = (int)(floor_y);
// get the texture coordinate from the fractional part
int tx = (int) std::abs(texture_size * (floor_x - current_cell_x));
int ty = (int) std::abs(texture_size * (floor_y - current_cell_y));
floor_x += floor_step_x;
floor_y += floor_step_y;
// choose texture and draw the pixel on the image
scene_pixels[i + (j-1) * w + h/2 * w ] = texture[tx + texture_size*ty];
}
}
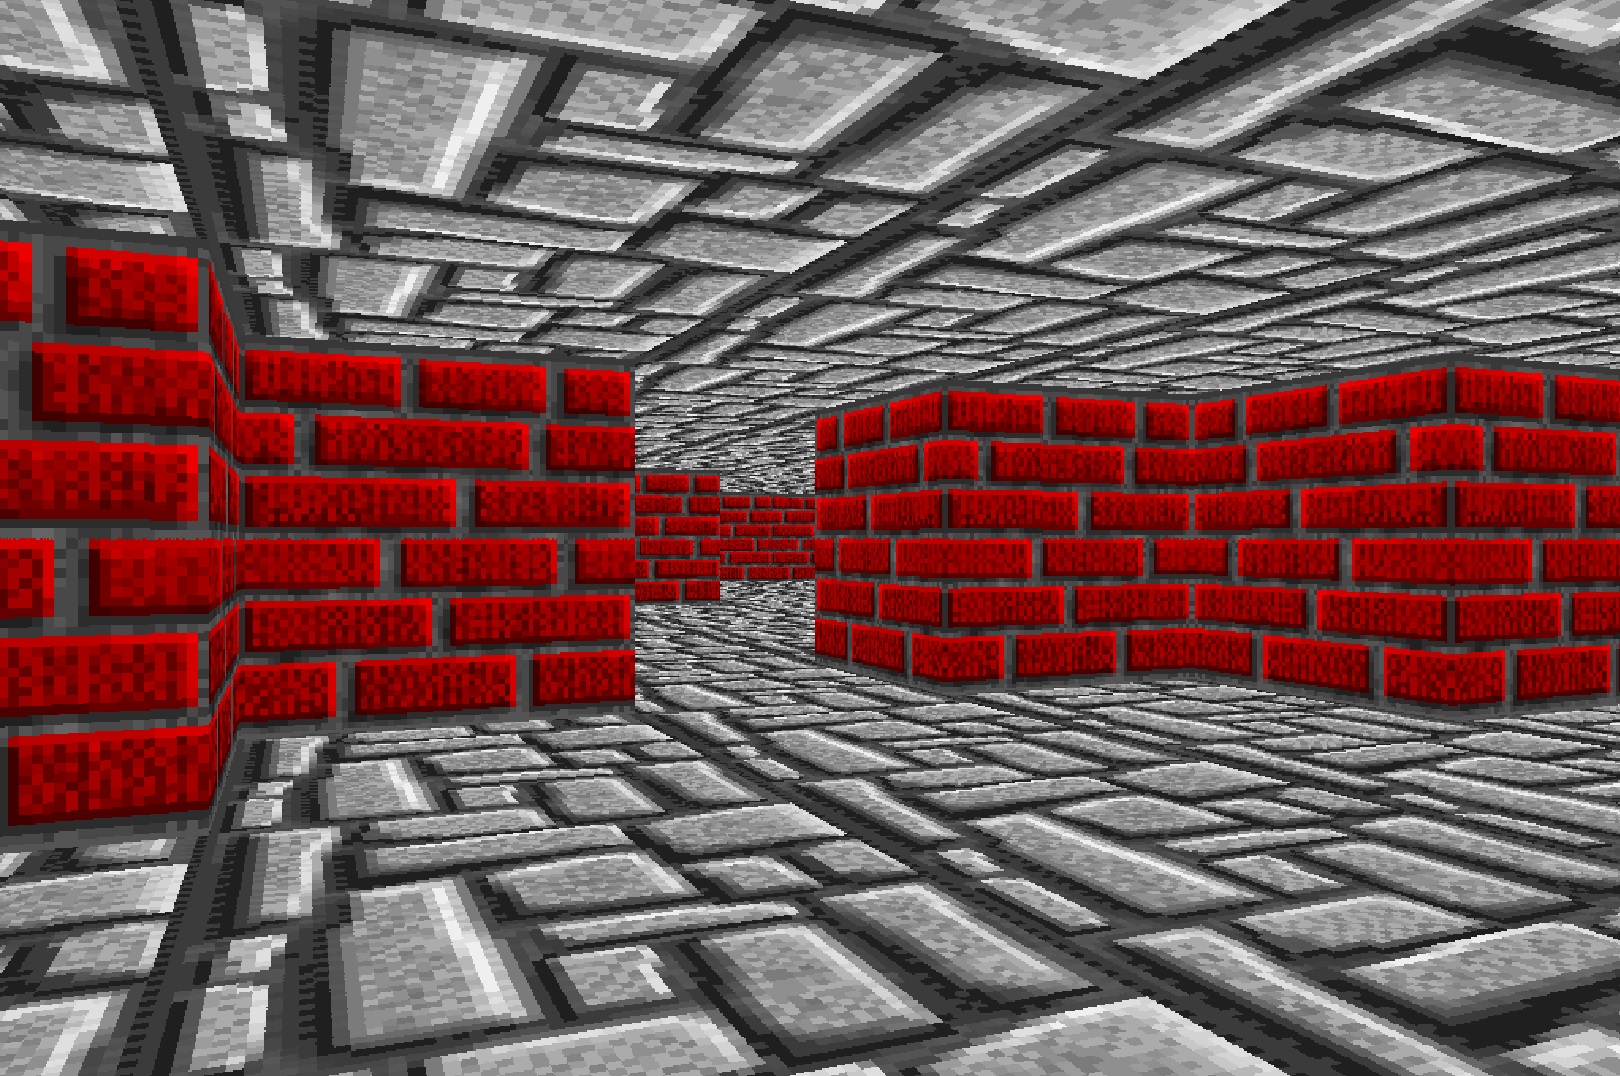
}And the ceiling ?
Well, it’s exactly the same thing! We keep the same vectors \(\vec{r}_i^{(j)}\) but we must draw the scanlines from the middle of the screen upwards.
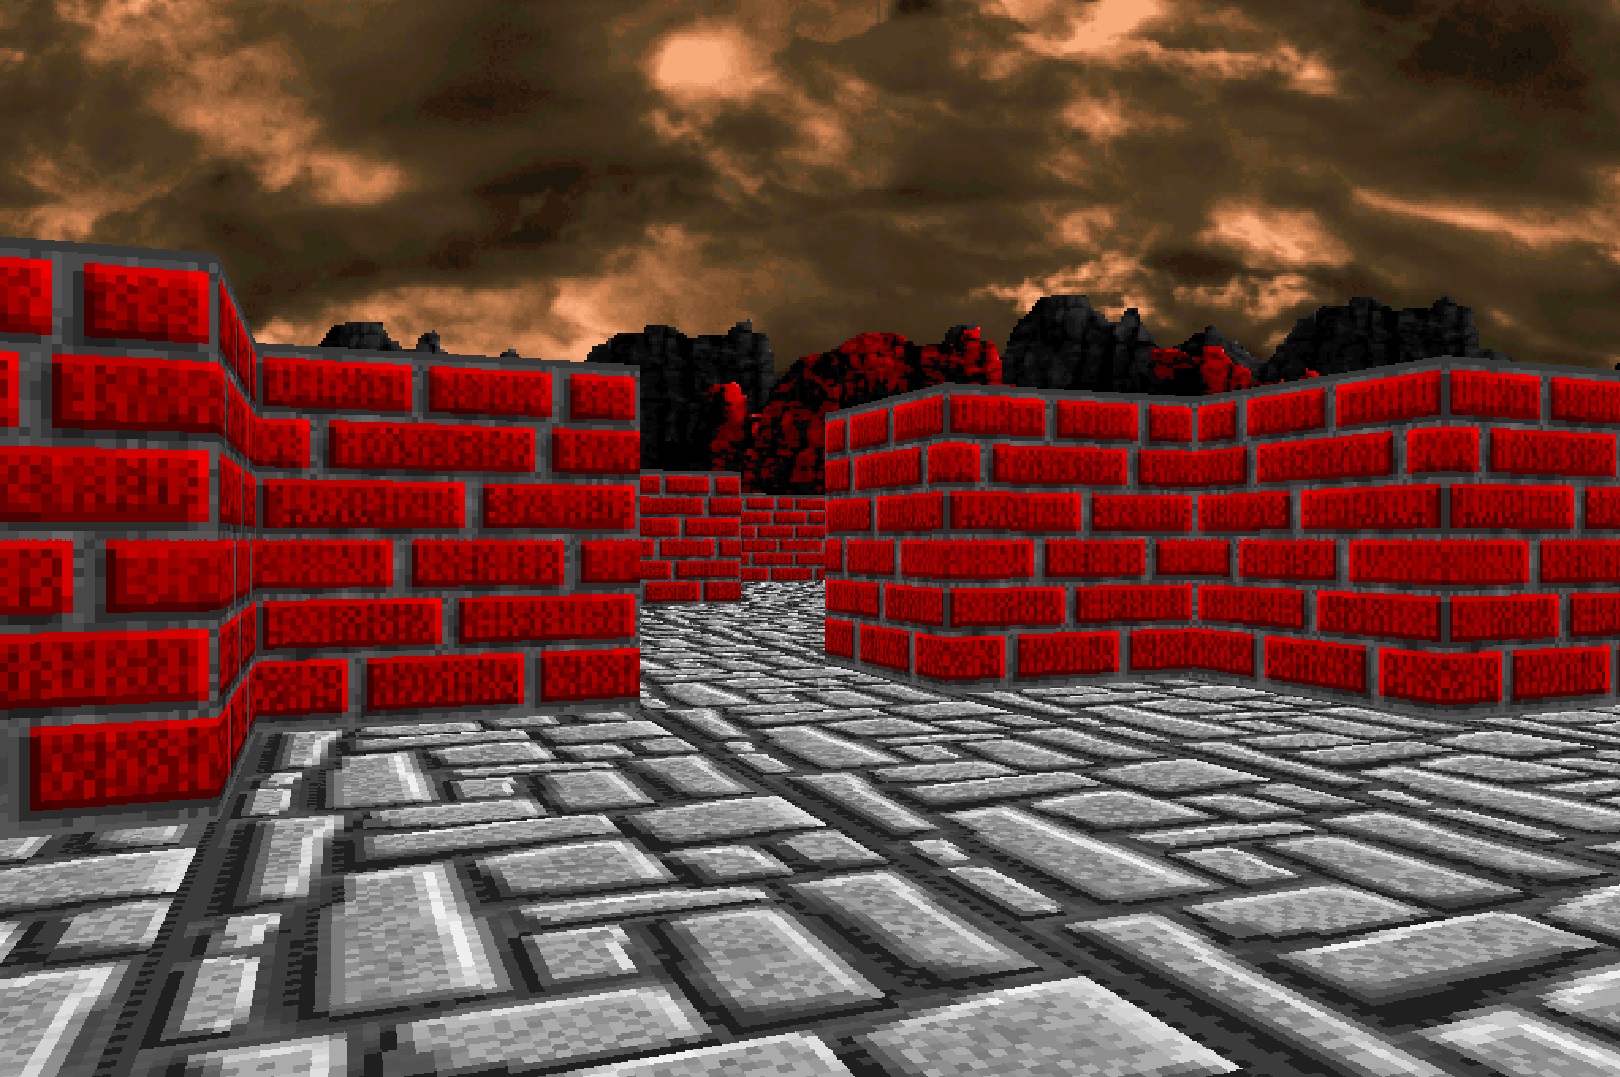
What about a sky ?
If you’re not a fan of the ceiling, you can always opt for a sky! The idea is to use a large tileable image that you’ll wrap around the scene. The portion of the image to display is calculated based on the player’s field of view.
Suppose we have an image that is \(N\) pixels wide for our sky. We can calculate that the width in pixels to display on the screen is:
\[N\frac{2\arctan(\|\vec{c}\|)}{2\pi};\]To determine where on the image to locate the area to display, you need to look at the player’s angle in the game, \(\theta\), and take the relative horizontal position on the image as:
\[N\frac{\theta}{2\pi} = N\frac{\arctan(d_y/d_x)}{2\pi}\]If the image isn’t wide enough, it’s possible to tile multiple images side by side. In the game, the landscape will repeat in multiple directions.